Kung Fu Flash
- gozdnijezek
- Sep 1, 2020
- 5 min read
Updated: Jul 16, 2022
Cartridge for the Commodore 64 that packs a punch.

Kung Fu Flash cartridge (Image from Kims Github)
What it is
It's an open source Commodore 64 flash cartridge designed by Kim Jørgensen that can be found for free on his github: https://github.com/KimJorgensen/KungFuFlash
Kung Fu Flash can emulate different cartridge types, load PRG files and use D64 disk images. Just place your desired CRT, PRG or D64 files on a FAT formatted microSD card and use the built-in launcher to execute them.
Long story short, it's an Easy Flash 3 on steroids, with a few notable weaknesses. It can't load kernels (jiffy dos, dolphin dos etc..) and currently works only on PAL machines. It does however load the software from microSD card, so adding new software and updating the firmware is trivial. NTSC support could also be added with a simple firmware update in the future (the author does not have NTSC machine in his possession). If anyone is interested in implementing it, please get in touch with Kim Jørgensen. The features are also being actively developed and new firmware updates are coming out regularly.
Supported Cartridges
Currently supported cartridge types:
Normal cartridge (8k, 16k, Ultimax)
Action Replay v4.x/v5/v6
KCS Power Cartridge
Final Cartridge III(+)
Simons' BASIC
Fun Play, Power Play
Ocean type 1
Epyx Fastload
C64 Game System, System 3
Dinamic
Zaxxon, Super Zaxxon
Magic Desk, Domark, HES Australia
Super Snapshot v5
Comal-80
EasyFlash
Supported File Types
Currently supported file types:
Cartridge (CRT)
Disk image (D64, D71, D81) (limited support)
Program (PRG, P00)
Firmware update (UPD)
How to use it
Kung Fu Flash is very easy to use; you add the software, turn on the C64 and you're good to go. Detailed steps are:
Add your desired game/applications to the FAT formatted microSD card
Kung Fu Flash is just like a normal cartridge and needs no additional cables or any other gadgets, just plug it to your cart port on your C64 and you're good to go.

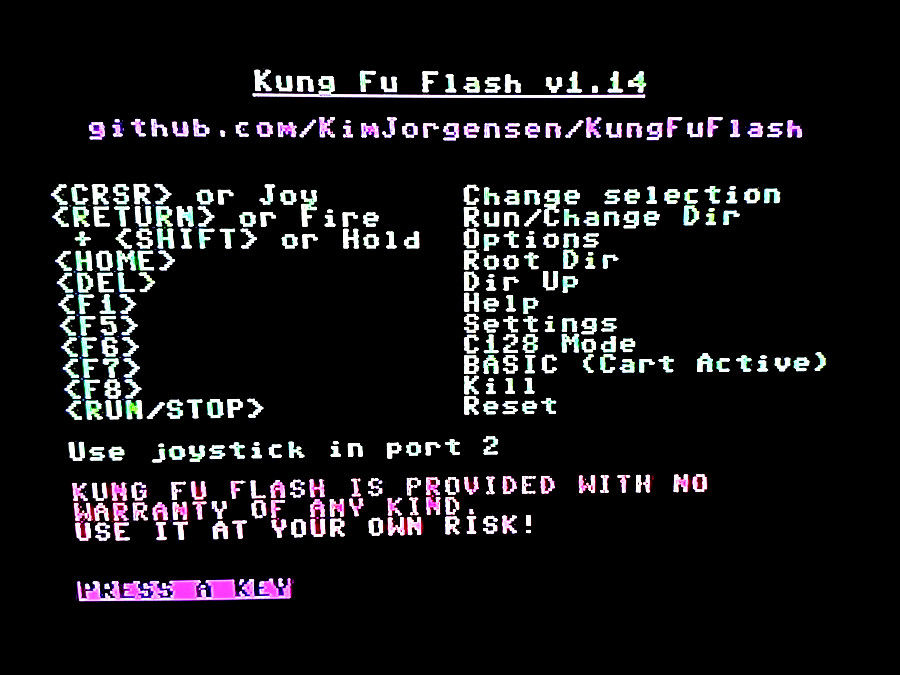
After you turn on your C64 for the first time you are presented with launcher menu (the same happens if you press on the menu button). (Image is from Kims Github).

After you select the game/application (you can navigate with joystick and select with button) it loads to the flash memory (this is almost instant, no longer than a couple of seconds).
The application then starts. (Note: if you restart your C64, the same application will automatically start, until you change it in the menu).
That's it, it's as simple as that.
YouTube video showing some of the functionalities it will give you a basic idea how everything works. The video is in Hungarian, but if you turn on the subtitles you can automatically translate it to English (works very well).
Retro Recollections also made a video about it:
Another YouTube video, but in lower quality:
Loading d64 images

There is also a limited support for d64 images, if you long press the fire button on the joystick the File Options menu will show. For disk images you need to select mount command, this will take you to the BASIC prompt, where you load the image normally with:
LOAD "*", 8
Help
For more commands press F1 and it will show the help page.
Forum thread where the author is active and contains more information:
Where to find the software
The most handy format for this cartridge are crt images and prg files (d64 has limited support):
There are also two very nice collections that contain a lot of games:
How to build it
Since Kung Fu Flash is not yet as established as Easy Flash or other products, there are not a lot of sellers/makers of the product. You might get lucky and find someone who ordered a batch for himself or even makes the product commercially. However making it yourself is
also not very hard, thanks to productive C64 community member Sándor Vass who made jlcpcb BOM and CPL files, which makes the whole process a lot easier.
Order a PCB
First you'll need a jlcpcb account, it's a Chinese service like PCBWay just cheaper. Go to https://jlcpcb.com/ and create an account.

After creating of the account, click on "Order now"

Upload the gerber files (KungFuFlash_gerber_revXX.zip)

Make sure the settings are as above

Click the "SMT Assembly" and select "Assemble top side", afterwards click Confirm


Make sure everything looks OK and click next

You're good to go, just add it to the cart and pay, that's it. Now the wait begins (I had to wait for 3 weeks, but your mileage may vary)
Manual assembly
After you'll receive your partially assembled PCB, it's time to add the through hole elements.

Partly assembled PCB

Solder the "Tactile Tact Push Button" (5mmx5mmx5mm for 3d printed case or 5mmx5mmx6mm for tfw8b case)

MicroSD adapter, part number is 112J-TDAR-R01(from Attend) from Aliexpress

Optional micro USB, part number is 10118194-0001LF (from Amphenol)
4 pin header

Fully assembled cart, I did not add the USB port because I don't need it. Micro USB makes the first firmware upload a bit easier, but I don't see myself using this feature in the future either.
First programming of the firmware
Programming software
To program the sm32 you'll need "STM32 ST-LINK utility", which can be downloaded from the official page, but if you don't want to register, there are alternative sources available (I won't share them here). Instructions on how to do initial programming can be found here:
Programmer
You will need an inexpensive STM32 programmer.
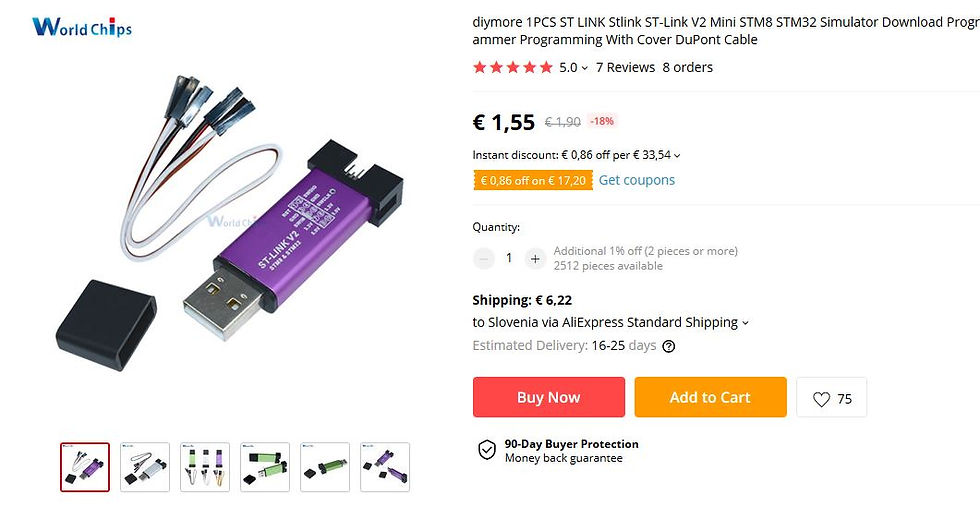
You can find it on eBay, Aliexpress, Amazon etc... just search for "STM32 ST-LINK programmer".
How to connect
Connect the ST-Link V2 programmer to J4 (3.3V, GND, SWDIO, and SWCLK) and connect BOOT0 to 3.3V.

How to program

Open the STM32 ST-LINK utility software

Open the KungFuFlash_xxxx.bin from your drive (rename the KungFuFlash_v1.xx.upd file to KungFuFlash_v1.xx.bin), see the instruction page.

Click Program& Verify

Upload the firmware (press Start)
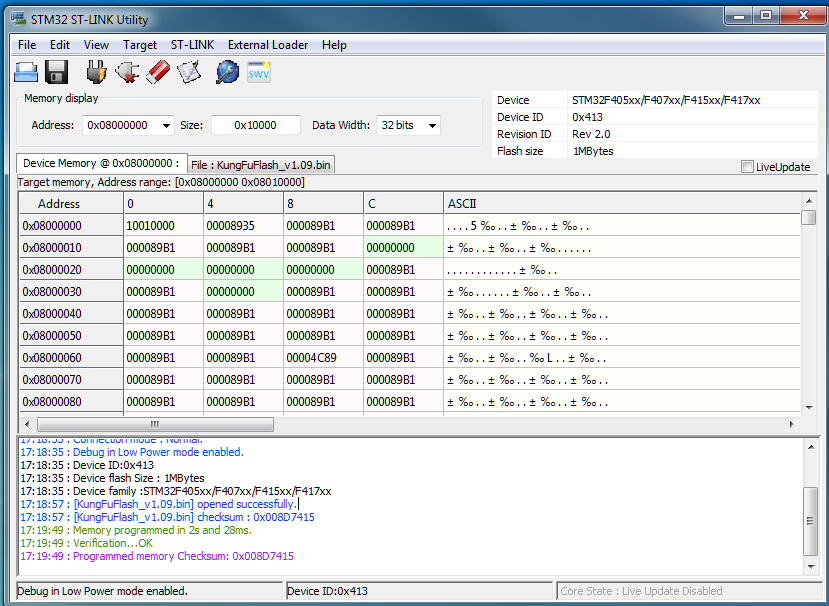
After upload you should see the console output as above.
Case
You can 3D print your own case or use the one from tfw8b, but you will have to drill the holes for buttons and use 5x5x6mm tactile switches.
3D printed case can be found on the thingiverse:

3D case before assembly
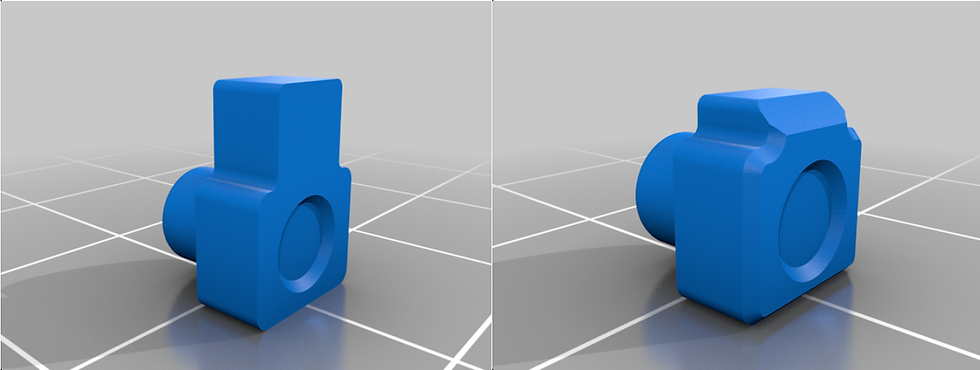
I selected the buttons with longer edge (left one).
M2 screw is used to hold the case together.
Label
To make your cart nice looking it has to have a nice label which can be found: https://github.com/KimJorgensen/KungFuFlash/blob/master/pics/label_600dpi.png
The printed size should be around 5.5cm wide. I found out that Hofer (or Aldi) does glossy stickers in their photo printing department. The prints are ideal for retro projects.

Firmware update
Since the build there were a couple of firmware updates, which indicates that this is a lively and active project. To install the latest update visit:
Just place the KungFuFlash_v1.xx.upd file on the SD card and select the file in the launcher to initiate the firmware update.
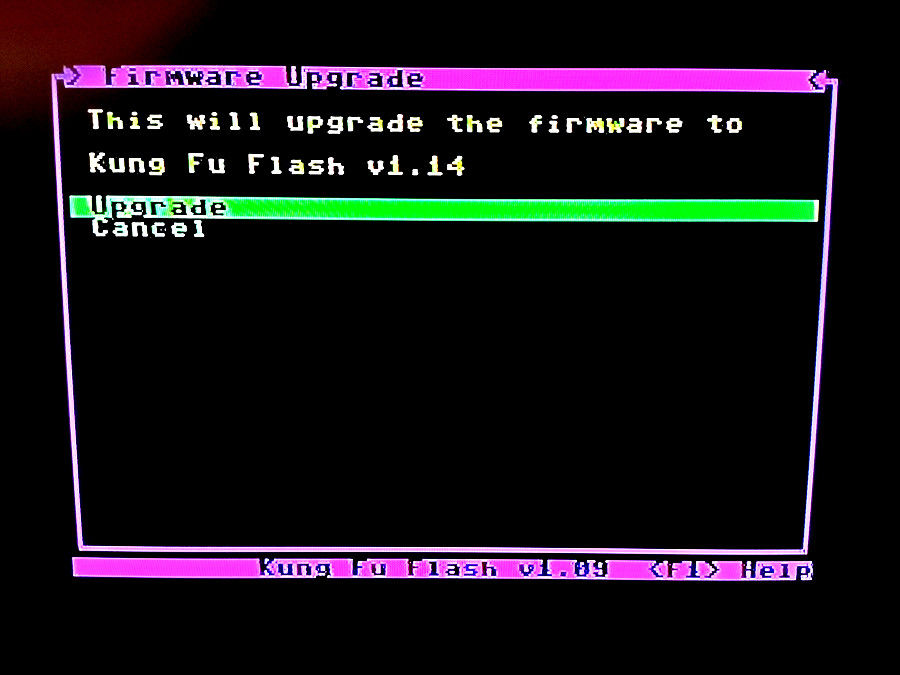
You should now have the latest firmware, easy as that.
Basic troubleshooting
After you plug the Kung Fu Flash to your C64, you should get the "Please insert a FAT formatted SD card" message.

This is expected if your SD card is not inserted.
If your SD card is inserted, then it could be two things:
Check the soldering on the microSD adapter
Something could be wrong with the microSD; I had problems with very long file names. To test this add a single crt file with short name, if it still does not work, check the microSD adapter solder joins.
If nothing is displayed after you plug your cart in, then most likely the SMT32 programming went wrong (less likely that the PCB has issues).


can i copy a D64 file to the flash card then write o a floppy on my 1541-II?
开云体育 开云体育 开云体育 开云体育
Hello, I think I found this article kind of late. How can I find the BOM and CPL files mentioned in this article? Thanks!
Hello,
where to find Sándor Vass jlcpcb BOM and CPL files?
I followed your instructions, and had JLCPCB build it, and added the SC Card adapter, the three tactile switches and the five pin header. Q1 was not wrong or faulty it just hadn't been installed (strange this is a common smd transistor).
By the way: I'm running version 1.17, and enjoying it... :)